TL;DR
- AI transcription turns speech into text fast, but accuracy depends heavily on recording quality, speaker overlap, and the vocabulary in your audio.
- The simplest reliable workflow is: prepare the audio → transcribe → spot-check early → edit the high-impact errors (names/numbers) → export in the right format.
- “Free” AI transcription often comes with minute caps, export limits, or shorter retention—test with a short clip before committing.
- Avoid common mistakes like using the wrong language setting, skipping speaker labels, and sharing sensitive transcripts without checking privacy controls.
What “AI transcription” actually means (and what it doesn’t)
AI transcription is software that converts spoken audio (or the audio track from a video) into written text using automatic speech recognition (ASR) models.
What it is good at:
- Producing a usable first draft in minutes
- Making audio searchable (great for finding quotes or decisions)
- Creating caption files (like SRT/VTT) for videos
What it isn’t:
- A guarantee of 100% accuracy—especially in noisy, multi-speaker meetings
- The same thing as “AI meeting notes” or summaries (those are usually a separate step that uses the transcript)
Speech-to-text vs. “AI notes” vs. full meeting summaries
- Speech-to-text (transcription): “What was said,” line by line.
- AI notes: A cleaned-up version of key points, sometimes with highlights.
- Summaries/action items: An interpretation layer that can be helpful—but it can also miss nuance if the transcript is weak.
If your goal is compliance, quoting, captions, or detailed review, start with a solid transcript first.
Why accuracy varies so much
AI transcription accuracy swings based on a few predictable factors:
- Audio quality: background noise, echo, low volume, clipping
- Speaker dynamics: people talking over each other, fast back-and-forth, interruptions
- Accent and clarity: regional accents, mumbled speech, distance from the mic
- Vocabulary: product names, acronyms, industry jargon, proper nouns
- Language setting: wrong language/dialect can wreck results even with good audio
When AI transcription is the right choice (and when you still need a human)
AI transcription is usually the right choice when you need speed and a strong draft you can lightly edit—meetings, interviews, classes, podcasts, and customer calls.
You may still need a human (or heavier editing) when:
- The audio is critical and legally sensitive
- There are many speakers and lots of cross-talk
- The transcript must be publication-ready with perfect names/titles/quotes

Before you transcribe: a quick checklist for better accuracy
You’ll get better results by spending 2–5 minutes preparing.
Pick the right input
Audio vs. video: what matters for transcription quality
Video doesn’t automatically mean better transcription. What matters is the audio track:
- Is the speaker close to the mic?
- Is there a lot of room echo?
- Is the audio compressed (common in screen recordings)?
If you can choose, a clean audio recording (even from a phone placed close) can beat a fancy video with poor sound.
File types and length limits to check
Most tools accept common formats like MP3, WAV, M4A, MP4, and MOV—but “free” tiers often limit:
- Maximum file size
- Maximum minutes per upload
- Number of exports
If your recording is long, consider splitting it into logical chunks (for example, 30–60 minutes).
Improve the recording (even if it’s already done)
Reduce noise and echo (simple fixes)
If you can re-record, do it. If you can’t, small fixes still help:
- Use a noise reduction feature in your editor (lightly—overdoing it can distort speech)
- Trim long silent sections
- If the recording is very quiet, normalize volume
Get closer to the mic and keep levels steady (next time)
For future recordings:
- Put the mic closer than you think you need
- Avoid recording across a big room
- Use headphones in online meetings to reduce echo and feedback
Organize speakers and context
Capture names/titles for speaker labels
If the tool supports speaker labels (often called diarization), having names ready saves time later. Even a quick note like:
- Speaker 1 = Alex (Sales)
- Speaker 2 = Priya (Customer)
…makes the editing phase much faster.
Make a short “terms list” for acronyms and jargon
Write down:
- Product names
- Acronyms
- Technical terms
- People’s names
You’ll use it to quickly fix repeated errors via search/replace.
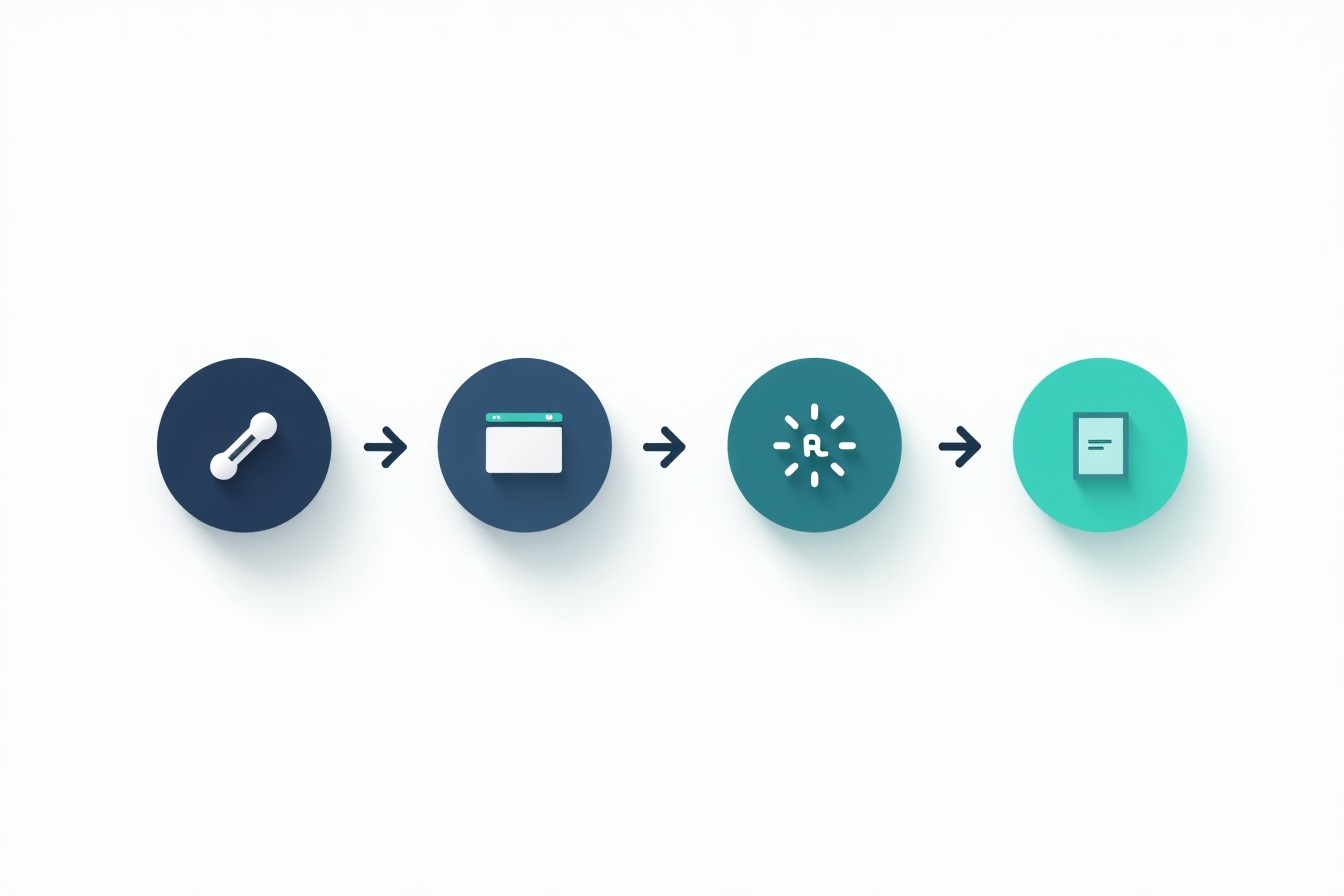
How to transcribe with AI: the practical step-by-step workflow
This workflow works for most tools, whether you’re transcribing a meeting, interview, lecture, or video.
Step 1: Upload a file or record directly
Most tools offer one (or both) options:
- Upload: best for existing recordings
- Record live: convenient for meetings or quick notes
If you’re transcribing video, you’re usually uploading the video file and letting the tool extract the audio.
What to do if you only have a link (Zoom/Meet/Teams) or a screen recording
If the tool can’t transcribe from a link:
- Download the recording first (or export the audio)
- If needed, convert the file to a common format (MP3 for audio, MP4 for video)
If you frequently work with uploaded recordings, an audio-to-text converter can simplify the upload → transcript workflow.
Step 2: Choose language and settings (if available)
If a tool asks you to choose language, don’t skip it—this is one of the most common sources of bad output.
Helpful settings to look for:
- Language/dialect (English US vs. other variants)
- Punctuation (automatic punctuation improves readability)
- Timestamps (useful for reviews and captions)
- Speaker diarization (separates speakers)
Language selection, punctuation, timestamps, and diarization
- Use timestamps when you’ll need to reference moments later (interviews, lectures, legal reviews).
- Use diarization when there are multiple speakers—otherwise editing becomes “who said what?” detective work.
Step 3: Let it run—then sanity-check the first minute
A good habit: once the transcript starts generating, check the first minute.
If the first minute is clearly wrong (wrong language, garbled words, missing sentences), don’t wait for the full output—fix the setting or audio first.
Step 4: Edit the high-impact errors first
Focus on:
- Names, numbers, and dates
- Technical terms and acronyms
- Speaker labels (if needed)
Step 5: Export in the format you actually need
Common exports:
- Plain text or DOCX (for editing)
- SRT/VTT (for captions)
- PDF (for sharing)
If you’re mainly transcribing video content, a video-to-text workflow is often a better match than treating it like “audio only.”
FAQ
Is there free AI transcription?
Yes—many tools offer free tiers, but they often cap minutes, limit exports, or reduce retention. Test with a short clip first.
What is the best AI for transcription?
It depends on your needs (single speaker vs. multi-speaker, timestamps, caption exports, privacy requirements). A practical approach is to test the same 2–3 minute sample across a few tools and compare.
How can I improve transcription accuracy?
Improve recording quality, pick the right language, enable diarization for multi-speaker audio, and fix names/numbers early.
Next step
If you want to turn recordings into clean transcripts (and then reuse them for summaries and action items), start here: Proactor.